Golden Hour vs. Blue Hour
Golden hour and blue hour are sisters, not twins. One wraps scenes in warm, directional light; the other trades warmth for clean color and time for long exposures. This guide shows what each looks like, when to switch, and field‑tested settings you can trust.
Use this as a quick primer, then hop into the focused guides for city work, mobile‑only shooting, and drones. All times come from the Golden Hour Now timeline—watch the countdown to know exactly when to pivot.

Look & mood
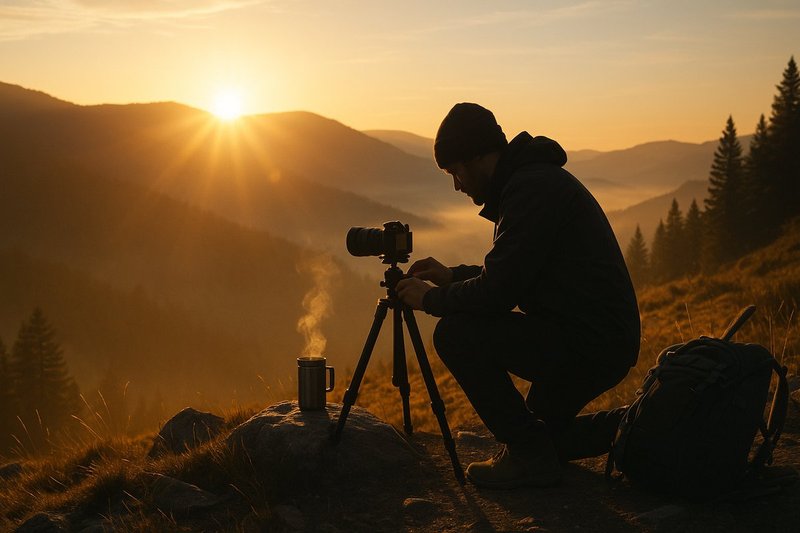
- Golden hour: Warm reds and ambers, directional but gentle light, long shadows that add shape. Skin tones look polished with minimal editing.
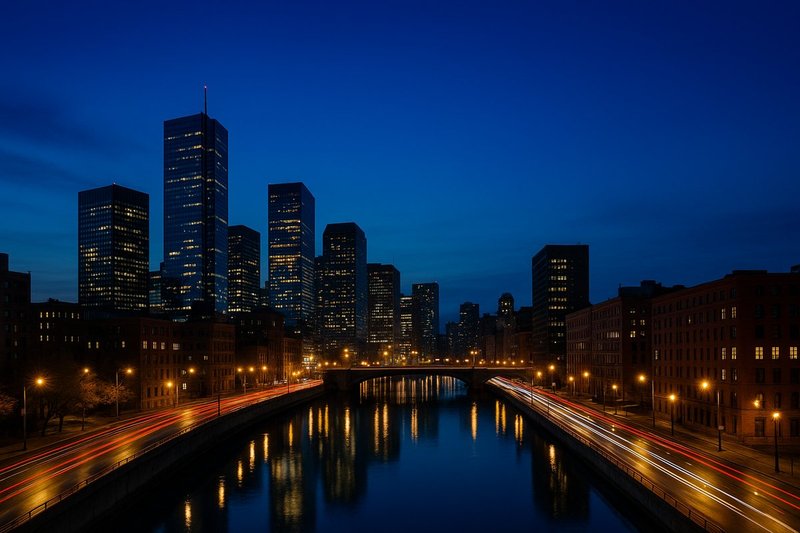
- Blue hour: Cobalt‑to‑violet skies with balanced street/building lights. Clean color and longer shutters for trails and silky water.
When to switch
Watch the “Next event” countdown on Golden Hour Now. As Golden PM ends and the Sun slips below the horizon, switch to tripod and blue‑hour settings. In the morning, reverse the order: start with Blue AM, then pivot to Golden AM.
- If your subject is backlit and the rim‑light fades, you’re passing peak golden hour—pivot to side‑light or prep for blue hour.
- Once bright signs and windows balance the sky (no heavy color cast), you’ve hit the blue‑hour sweet spot—start your longer exposures.
- On overcast days, treat golden hour as “soft‑box time.” Blue hour may be shorter but can still deliver clean color in the sky.
Recipes: reliable starting points
Portraits at golden hour
- Lens: 50–135 mm. Start f/2–f/4 for separation.
- Exposure: ISO 100–400, 1/250–1/500 s; spot meter the face or use face‑detect.
- Angle: backlight for halo; add +0.3 to +0.7 EV or a small reflector to lift eyes.
- White balance: 5000–5500K for clean skin; warmer if you want mood.
Landscapes at golden hour
- Lens: 24–70 mm or 70–200 mm for compression.
- Exposure: ISO 100–200, f/8–f/11, shutter as needed; meter for highlights to keep the glow.
- Composition: shoot ~90° to the Sun to emphasize texture; use foreground for depth.
Cityscapes in blue hour
- Tripod mandatory. Start ISO 64–200, f/8–f/11, 2–10 s shutter.
- Time traffic lights so trails converge toward your subject; start exposure just before green.
- White balance: 3200–4200K for clean color; bracket ±1 EV if signs/windows clip.
Water & reflections (blue hour)
- Use 4–10 s for smooth water; longer for glassy harbors.
- Get the lens low for mirror‑like puddles after rain; tilt down slightly to avoid clipping highlights in reflections.
Mobile‑only quick recipe
- Use the main (wide) camera for best sensor.
- Tap‑to‑expose on the face/bright edge; drag exposure slightly down (−0.3 to −0.7 EV).
- Stability: lean on a railing or mini‑tripod; enable a 2 s timer to avoid shake.
- Color: use Daylight/Neutral preset if available to keep warmth consistent.
Drone texture at golden hour
- Airspace/legal check first; set a conservative Return‑to‑Home height.
- Shoot AEB (auto exposure bracketing) for dynamic range.
- Fly ~90° to the Sun to reveal relief; keep the Sun just off‑frame for contrast.
- Start 1/60–1/250 s, ISO 100–200; f/2.8–f/5.6 depending on drone.
Troubleshooting & real‑world adjustments
- Haze or marine layer? Expect softer contrast. Push exposure to protect highlights and lean into silhouettes or rim‑light.
- Wind during blue hour: shorten shutter to 1–2 s to keep trees/flags crisp; stack a few frames later if needed.
- Uneven sky with polarizer? Remove or rotate it—polarizers can create blotchy gradients at wide angles.
- Crowds: plan a near/far composition so moving people blur into pleasing trails instead of blocking the subject.
Case studies & examples
Golden‑hour portrait with rim light
To see golden hour in action, let's walk through a real session. We positioned our subject on a ridge with the sun just above the horizon behind them, using an 85 mm prime lens and stepping back to frame from mid‑torso up. Exposure started at ISO 100, f/2.8, and 1/400 s with +0.3 EV compensation to keep skin luminous. As the sun dropped, we opened to f/2 to maintain bokeh and raised ISO to 200 to keep 1/250 s. We also brought a small reflector to lift the eyes without washing out the warm rim. If your subject has dark clothing, spot‑meter the face and shoot a burst; subtle head turns will catch the halo at its peak【489526934332223†L190-L205】.
Shot description: A close‑up portrait of a person standing on a hill at golden hour with warm rim light outlining their hair, eyes glowing and the valley softly blurred in the background (photo to be inserted).
Blue‑hour cityscape with reflections
For blue hour, we set up on a riverwalk facing downtown just after sunset. We mounted a 24–70 mm zoom on a tripod and dialled ISO 64, f/11 and a 5 s shutter to capture both car trails and reflections in the water. We waited until the sky turned deep cobalt and the building lights balanced—about 15 minutes after sunset—and then triggered exposures as traffic lights cycled. To avoid clipped highlights we bracketed ±1 EV and later blended exposures in post. Blue‑hour color comes from Rayleigh scattering as the sun dips well below the horizon【489526934332223†L150-L156】, so leaving a little room in the histogram preserves those violets and blues for editing.
Shot description: A wide cityscape at blue hour showing a river with smooth reflections, trails of car lights on a bridge, and a skyline against a deep blue sky (photo to be inserted).
