Methodology
How we calculate golden & blue hour
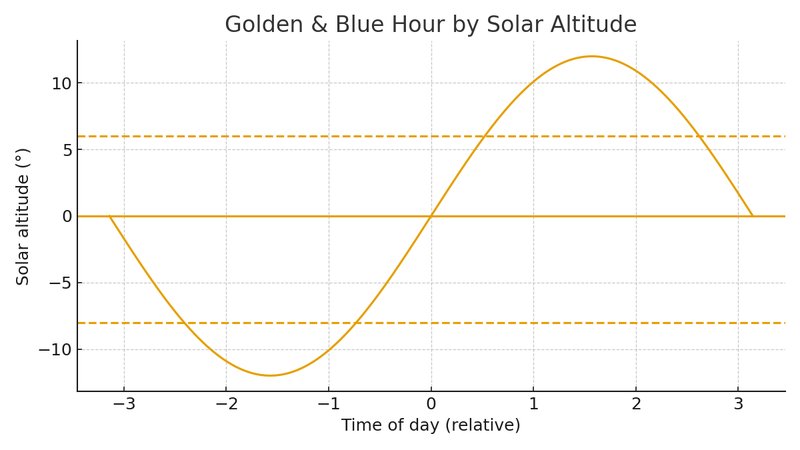
Golden Hour Now computes light windows directly from the Sun’s position rather than relying on broad averages. In practical terms, we track the Sun’s solar altitude—its angle above or below the local horizon—and mark the time ranges that photographers care about. The consensus in field practice is:
- Golden hour: when the Sun’s center is roughly 6° to 0° above the horizon (morning and evening). This yields warm, directional light, long shadows, and gentle contrast.
- Blue hour: when the Sun’s center is roughly 0° to −8° below the horizon (dawn and dusk). Ambient blue light and artificial lights balance for clean color and long exposures.
These boundaries are deliberately conservative so the times hold up across latitudes and seasons. We also align sunrise/sunset to the standard refraction-corrected altitude of about −0.833° for the solar center, which accounts for the Sun’s apparent radius and atmospheric bending at the horizon.

Algorithms (plain‑English summary)
Under the hood, we implement compact solar geometry functions similar to the well‑known NOAA/USNO approach. At a high level:
- Convert time to Julian days from the Unix epoch to get a stable time base for celestial math.
- Compute the Sun’s mean anomaly and ecliptic longitude with small periodic corrections.
- Derive the Sun’s declination (tilt relative to the equator) and the local sidereal time for the observer’s longitude.
- For any target altitude h (e.g., 6°, 0°, −8°), solve the hour angle where the Sun crosses that altitude given the observer’s latitude and the Sun’s declination.
- Translate crossings to clock times in the local timezone and group them into continuous windows: Blue AM → Golden AM → Daylight → Golden PM → Blue PM.
This method produces consistent, minute‑accurate times without calling heavy third‑party services for each query. Edge cases—very high latitudes, or days with no true night—are detected and handled with explanatory notes.
Libraries & implementation details
- Math/astronomy: We use small, in‑app functions for solar position (mean anomaly, ecliptic longitude, declination, hour angle, refraction‑aware sunrise/sunset). No large external astronomy library is required.
- Time & formatting: Native
Intl.DateTimeFormatfor locale‑aware times and timezone abbreviations. - UI logic: A lightweight script builds the colored timeline, quick links, and “next event” countdown.
If we ever swap in a dedicated library (e.g., for more exotic twilight definitions), we’ll note that change here and in the changelog.
Data sources
- Geocoding: OpenStreetMap’s Nominatim for search and reverse‑geocode, with place names and coarse admin info.
- IP fallback: If you allow location but the browser can’t provide it, we temporarily approximate with IP geolocation (ipapi.co or ipwho.is) to get a starting city. You can always change it via search.
- Timezone: We resolve the IANA timezone from geocoded location; if that fails, we apply a conservative regional fallback (e.g., US timezones by longitude; EU default to Europe/Paris) and display the abbreviation so discrepancies are obvious.
- No personal tracking: We don’t need or store personal identifiers to compute light windows.
Definitions & thresholds we use
- Sunrise/sunset: Solar center at −0.833° altitude (standard refraction/solar‑radius convention).
- Golden hour: 6° → 0° (AM and PM). We favor the warmer, usable light window without drifting deep into daytime.
- Blue hour: 0° → −8° (AM and PM). Well‑balanced ambient/city light with clean color.
- Nautical/civil twilight: We reference the conventional −12°/−6° breakpoints to cross‑check our blue‑hour bounds.
Quality assurance
We validate in three layers:
- Numerical checks: Unit tests compare our sunrise/sunset and twilight crossings against trusted references for a global grid of cities across seasons. We allow small tolerances for refraction and elevation model differences.
- Field tests: We regularly shoot portraits, landscapes, and city blue hour and compare the perceived “sweet spot” with the predicted windows.
- Edge‑case audits: DST transitions, leap days, high‑latitude summers/winters, and locations with obstructed horizons (mountain valleys, dense skylines) get extra scrutiny and notes.
When results disagree with lived experience (e.g., persistent marine layer, wildfire smoke), we update the Guides with adaptation tips rather than hiding the times—so you can still plan and then adjust on location.
Known limitations
- Horizon obstructions: Buildings, trees, and terrain shift the apparent start/end of each window compared with a flat horizon.
- Weather: Cloud layers, haze, and humidity can mute color or reduce contrast even when times are perfect.
- Extreme latitudes: Golden/blue hour can stretch or vanish seasonally. We detect and annotate unusual conditions.
Reproducibility & transparency
Our goal is practical transparency: the thresholds above, a clear description of our algorithm, and visual cues in the UI so you can see what’s next at a glance. If you need additional detail—exact formulas, code snippets, or test fixtures—reach out; we’re happy to share more with educators and teams.